The morning of a food festival or mela is chaotic. Vendors are setting up, crowds are forming at the gates, and the last thing you want to worry about is managing thousands of pre-printed paper coupon booklets. It takes just one misplaced box of booklets to throw your entire event's revenue reconciliation into chaos.
Fortunately, moving from vulnerable pre-printed booklets to a secure, dynamic digital printing system does not require days of IT configuration. With EventCouponPrint by ATSonline, you can convert a standard laptop and thermal printer into an impenetrable, high-speed coupon issuing system in less than 10 minutes. This guide will walk you through exactly how to do it.
Phase 1: Hardware Preparation (Minutes 0 to 3)
The beauty of this system is that it relies on extremely common, highly affordable hardware. Before the gates open, you simply need to position the hardware at your main coupon counter.
- Position the Admin Laptop: Place a standard Windows PC or laptop on the ticketing counter. This will serve as your master server and printing terminal. Ensure it is plugged into a power source, as it needs to run continuously throughout the event.
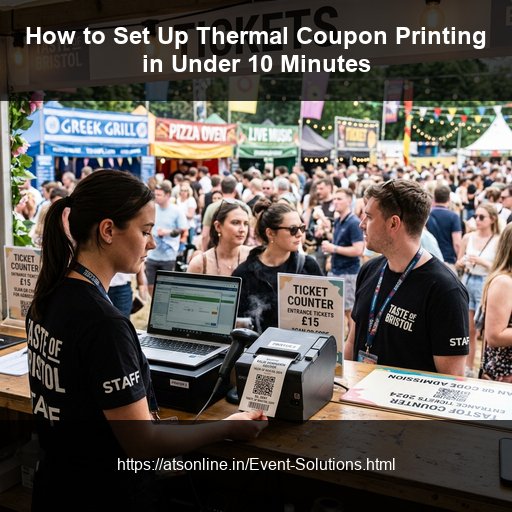
- Connect the Thermal Printer: Place an 80mm thermal receipt printer (the standard size used in restaurants) next to the laptop. Connect the power cable and plug the USB cable directly into the laptop. Ensure a fresh roll of thermal paper is loaded.
- Setup the Local Network (Optional but Recommended): While a single counter can run independently, if you plan to have food stalls scan and redeem coupons using mobile devices, plug in a standard Wi-Fi router. Connect your laptop to this router. You do not need an active internet connection—the router is simply to create a local wireless area network (WLAN) for the stall devices to talk to the laptop.
Phase 2: Software Configuration (Minutes 3 to 7)
Once the hardware is physically connected, it's time to open the EventCouponPrint software and customize it for your specific food festival.
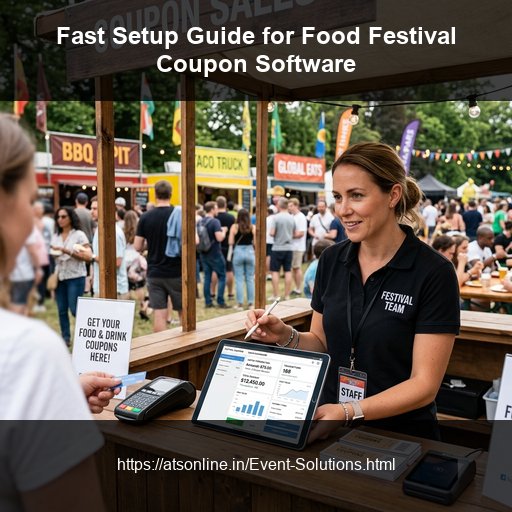
1. Event Details & Branding
Open the EventCouponPrint dashboard and navigate to the Settings tab. Enter the name of your food festival (e.g., "Delhi Food Truck Fest 2026"). You can also upload a black-and-white logo in `.bmp` or `.png` format. This branding will be printed at the top of every single coupon, creating a highly professional look that pre-printed slips cannot match on short notice.
2. Configuring Denominations
Under the Denominations section, define the coupon values you want to sell. Unlike pre-printed booklets where you are locked into a ₹50 or ₹100 sheet, you can configure dynamic values. For example, add buttons for ₹20, ₹50, ₹100, and ₹500. If a visitor asks for ₹340 worth of coupons, you can simply type "340" and the system will print the exact amount in a combination of the highest available denominations.
3. Registering Food Stalls
Navigate to the Stall Management tab. Input the names of the vendors operating at your festival (e.g., "Stall 1 - Momos", "Stall 2 - Biryani"). The system will generate a secure login or sync profile for each stall. This is critical for end-of-day reconciliation, as the system will track exactly which stall scanned which barcode.
Phase 3: The Test Print (Minutes 7 to 10)
Before the crowd arrives, you must verify that the printer and software are communicating perfectly.
Go to the main Sales Dashboard. Click on a ₹100 denomination button and hit "Print." Within three seconds, the thermal printer should dispense a clean, sharp coupon. Look at the coupon and verify the following:
- Is your event logo and name clearly visible at the top?
- Is the denomination (₹100) printed in a large, readable font?
- Is the unique Barcode or QR code printed crisply at the bottom?
- Is the unique serial number (e.g., #0001) present below the barcode?
Once the print looks perfect, open the redemption app on one of the stall tablets. Use a Bluetooth barcode scanner or the tablet's camera to scan the coupon you just printed. The app should instantly flash green, reading "Approved - ₹100."
Congratulations. In less than 10 minutes, you have transformed a chaotic ticketing process into a highly secure, fraud-proof digital system. You are ready to open the gates.
The Impact of a 10-Minute Setup
Investing these 10 minutes before your event pays massive dividends when the event concludes. By the time the festival ends, you do not need to spend three hours counting paper slips and arguing with vendors about mismatched totals. You simply open the EventCouponPrint dashboard, click "End of Day Report," and instantly view a flawless mathematical breakdown of exactly how many coupons were sold, which stalls redeemed them, and the exact payout owed to each vendor.
Frequently Asked Questions
Stop Using Paper Booklets at Your Next Event
Modernize your food festival with the EventCouponPrint Software. Setup takes minutes, but the security and peace of mind last forever.